5.1 Issuing cards
You can issue a card directly, or you can request a card that the user can then pick up. Depending on how your system is set up, it may be necessary to validate a card request before the card can be collected.
5.1.1 Issuing a card
The Issue Card workflow allows you to issue a card to a MyID user. The user must already exist in the database before you can issue a card.
To issue a card:
- From the Cards category, click Issue Card.
- Use the Find Person stage to search for the person to whom you want to issue a card.
-
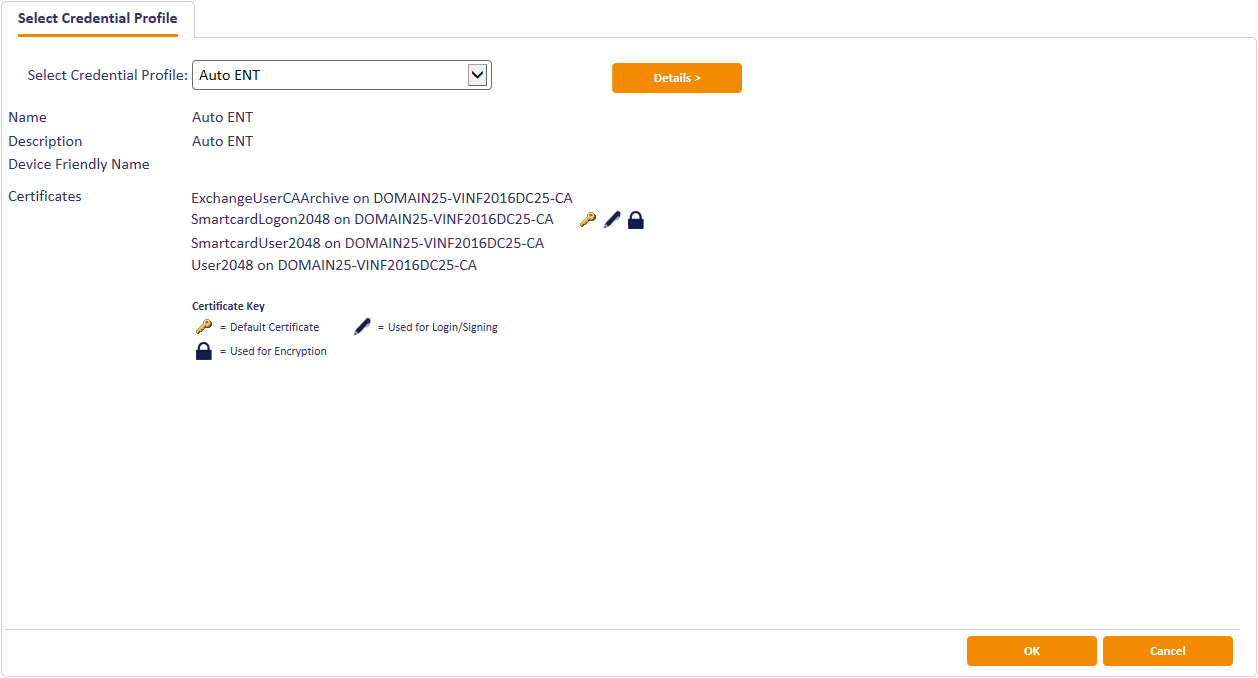
Select the person. The Select Credential Profile screen appears.

Click the Details button to view the details of the profile that is currently selected. Click Hide to return to the original view.
-
You may be able to specify an expiry date for this card (see section 5.2, Setting expiry dates for a card).
Select the option to display a field where you can specify a date.
-
Select the profile you want to use from the drop-down list, then click OK.

-
Insert a blank card into the reader.
If you want to print the card, click Use Card Printer. This allows you to either load a new card into the card printer or eject the card.
Select the correct printer from the Select Printer list and click the Load New Card or Eject Card button.
-
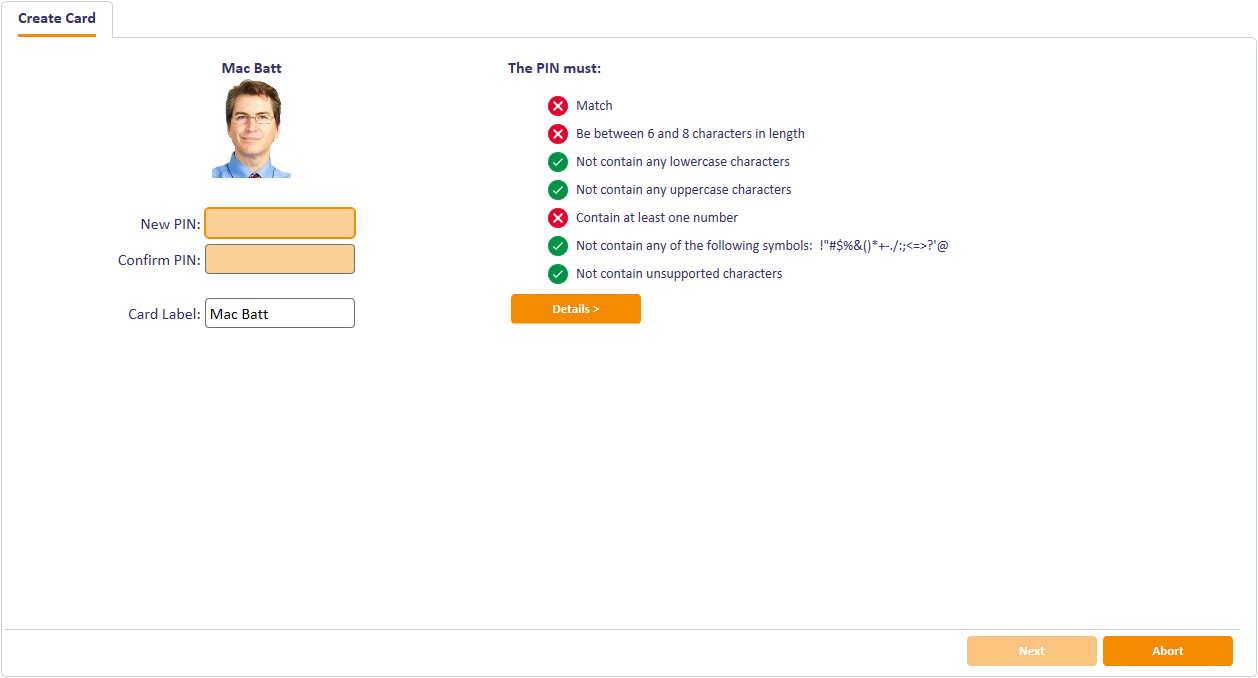
In the Create Card stage, enter or view the PINs for the card:
- If the card has a contact chip, type and confirm its PIN.
- For each hardware and software one time password:
- If the type of password required in the profile is User, type and confirm the PIN.
- If the type of password required is Device, the PIN is the same as the PIN for the contact chip.
- If the type of password required is Server, the PIN is generated.
- If the type of password required is None, there is no PIN.
Note: The Show Generated PINs configuration option must be set to Yes to allow the system to display the PINs for random or server-generated PINs. See the PINs page (Security Settings) section in the Administration Guide for details.
Click Details to show details of the information that will be written to the card (see below). Click Hide to show the summary.

-
If the credential profile requires secondary validation, a witness must insert their card to validate the issue of the card.
MyID then writes any certificates to the new card.
-
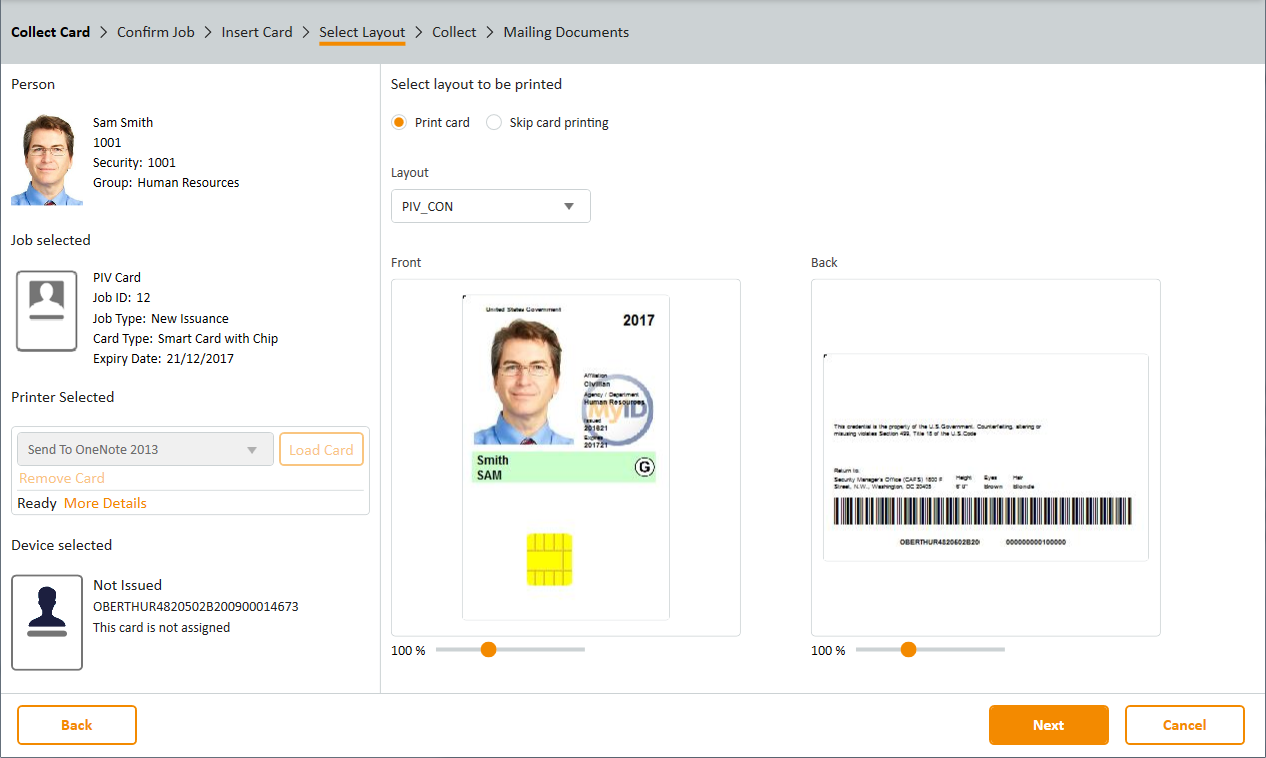
The Print Card stage lists all card layouts that are available to the credential profile being issued. Clicking a layout shows you how the card will appear when printed, with the user image and dynamic fields populated automatically.
Note: If the preview image of the card displays an error with the following:
Unable to retrieve card layout preview
see section 5.12.4, Troubleshooting card layout preview issues.
- Either click Print to print the card or click Skip Printing to end the workflow without printing the card.

If there is a problem when issuing the card, you may be able to select a different credential profile or card to attempt to issue the card again.
5.1.2 Requesting a card
The Request Card workflow allows you to request a card that can be collected later using the Collect Card or Collect My Card workflows. Depending on how your system is set up, it may be necessary to validate a card request before the card can be collected.
To request a card:
- From the Cards category, click Request Card.
- Use the Find Person stage to search for the person to whom you want to issue a card.
- Select the person. The Select Credential Profile screen appears.
- Select the credential profile you want to use from the drop-down list.
-
You may be able to specify an expiry date for this card (see section 5.2, Setting expiry dates for a card).
Select the option to display a field where you can specify a date.
-
To request a card using this profile, click Request Card.
To pre-allocate a specific card, click Assign Card:
-
If the Allow card serial number to be entered during Request Card workflow option is set to Yes, you can enter the serial number.
You can include ? and * as wildcard characters; any unassigned devices, or devices with unrestricted cancellation, that match the search criteria are displayed; the device serial numbers must already be known to MyID. If more than 10 devices match the search criteria, you must search again with more restrictive criteria.
- Alternatively, insert the card you want to allocate.
MyID creates the card request job.
-
-
IKB-367 – Problem adding a user from Active Directory where the logon name already exists in MyID
A problem has been identified when the following scenario occurs:
-
A user account is added to MyID from Active Directory.
-
The user account is removed from Active Directory, but no removal of the account from MyID takes place.
-
A new user account is created in Active Directory with the same logon name.
-
An attempt is made to request credentials for that user account in MyID.
When this occurs, errors similar to the following appear:
-
In the Request Card workflow in MyID Desktop:
There has been a problem validating the user due to missing or invalid data
-
In the Request Device screen in the MyID Operator Client:
Validation problem, the value for 'logonName', 'Logon', already existsError number: WS40001
As a workaround, you can remove the user account from MyID using Remove Person and repeat the steps to create the new request.
-
5.1.3 Validating a card request
If the credential profile has the Validate Issuance option set in the Issuance Settings, you must validate a card request before the card can be issued. The validator must be a different person than the person who requested the card or the person to whom the card will be issued.
The Validate Request workflow allows you to validate a card request.
To validate a request:
- From the Cards category, click Validate Request.
-
Enter the search details for the job, then click Search.
-
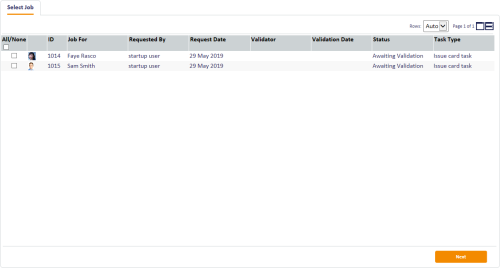
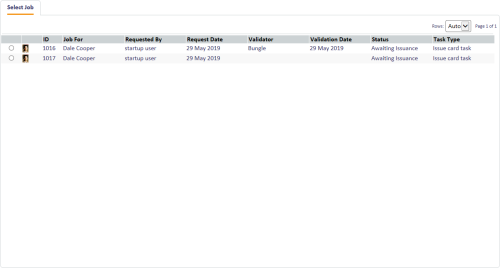
From the list of jobs, select the card request you want to validate, and click Next.
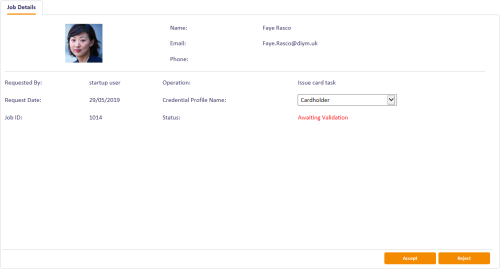
- You can select a different credential profile from the list if necessary.
- If the option to specify an expiry date has been enabled (see section 5.2, Setting expiry dates for a card), you can set or change the expiry date for the card.
-
Click one of the following options:
- Accept to validate the card request. The card can now be issued.
- Reject to reject the card request. The card can not be issued.


5.1.4 Collecting a card
You can collect a card that has been requested for another user.
To collect a card:
-
From the Cards category, click Collect Card.

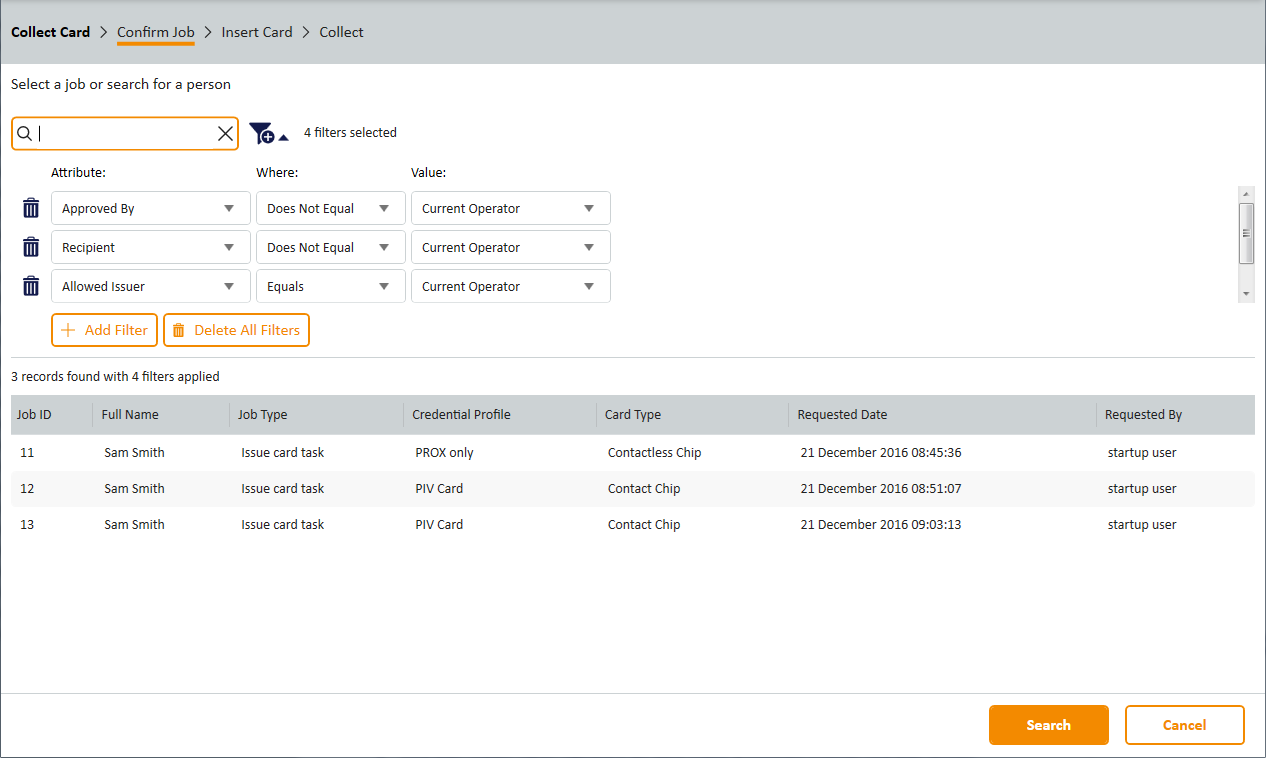
-
Enter the search details for the job, then click Search.
For details of using search filters, see section 2.2.3, Using advanced search.
-
Select the job from the list.

-
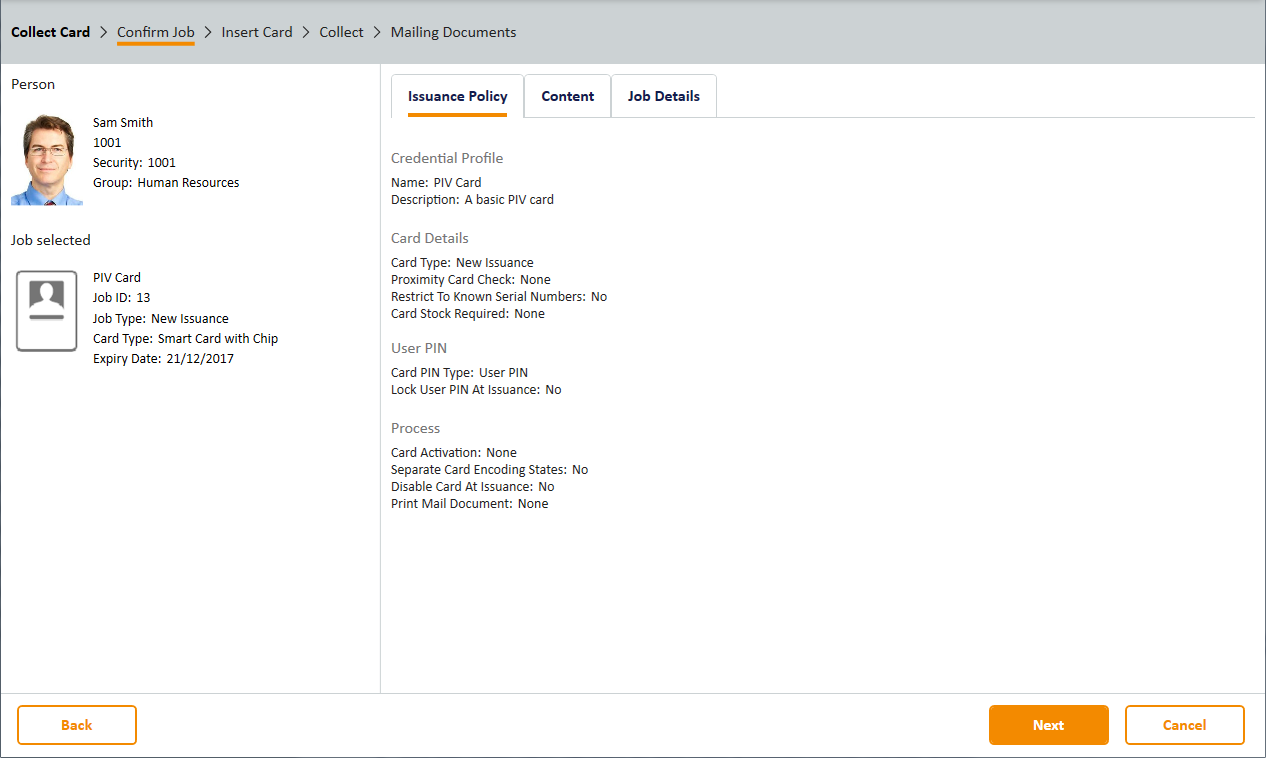
Make sure that the details of the job are correct. This screen lists the following:
- On the Issuance Policy tab, details about the credential profile that will be used to issue the card.
- On the Content tab, details about the card content, including format and certificates.
- On the Job Details tab, details about the request and approval of the card, the job label, and any assigned card details.
- If you have the Display person details during confirm job configuration option (on the LDAP tab of the Operation Settings workflow) set, an additional tab labeled Person Details is available.
-
Click Next.
-
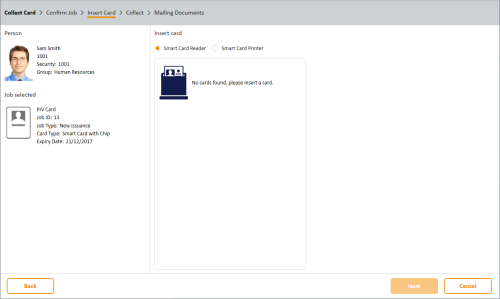
Select
- Smart Card Reader – select this option to issue the card using a card reader attached to your PC.
- Smart Card Printer – select this option to issue and print the card using a card printer attached to your PC.
For more information about using a card printer, see the Printer Integration Guide.
-
Insert a card into the card reader
If there is more than one suitable card inserted, select the card you want to use. If only one suitable card is inserted, the workflow automatically moves on to the next stage.
- Depending on how your system is configured, you may see a warning at this stage; when you install MyID, the settings on the Device Security page of the Security Settings workflow are configured to require you to use customer GlobalPlatform keys and random Security Officer PINs (SOPINs). The system is also configured to display warnings if your system is not securely configured. See the Device Security page (Security Settings) section in the Administration Guide for details.
- Click Next.
-
If the credential profile is set up for activation, the workflow ends here; to complete the issuance of the card, you must use an activation process.
See section 5.4.1, Activate card, section 5.4.2, Assisted activation, and the Activating cards section in the Administration Guide for details.
-
If you are using a card printer, select the card layout you want to use.

If you decide not to print at this stage, click Skip card printing.
-
Click Next.

-
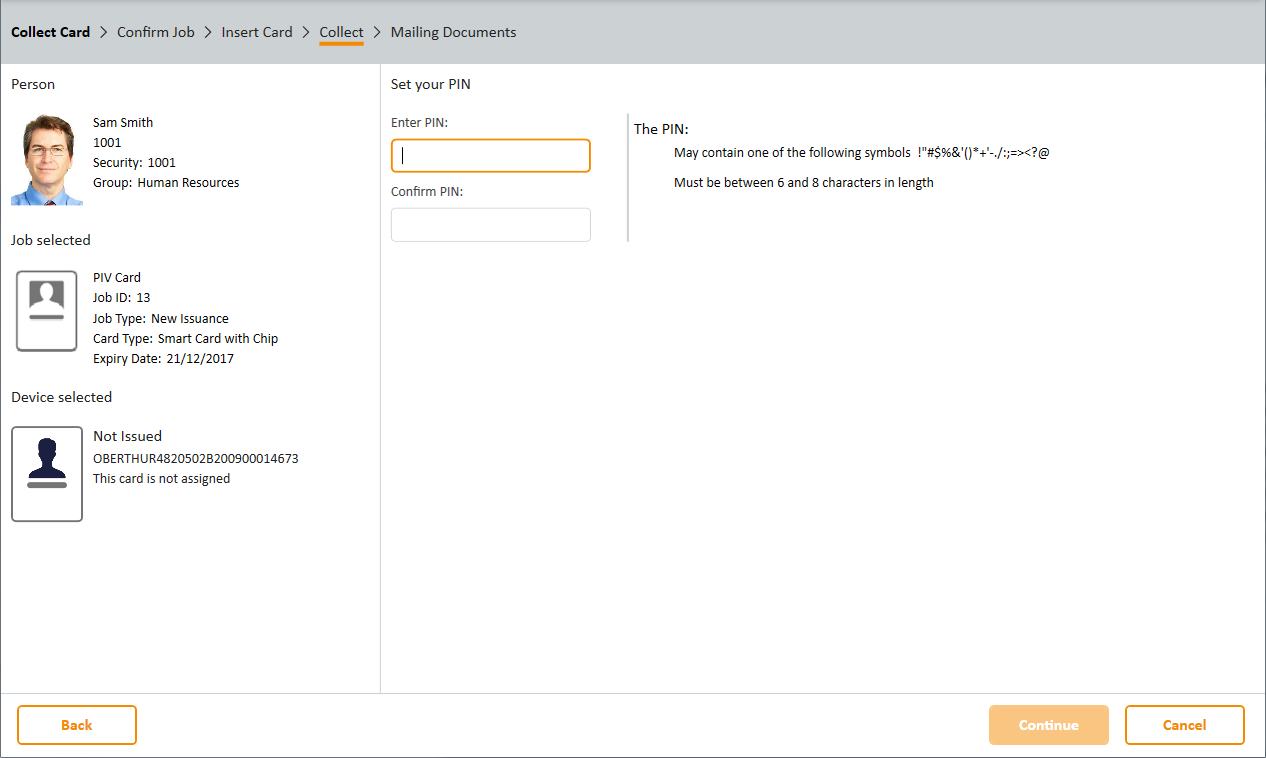
Type the PIN for the card in the Enter PIN box, then again in the Confirm PIN box.
MyID provides feedback on-screen that the PIN meets the requirements configured in the credential profile. Once you have entered and confirmed a valid PIN, click Continue.
MyID writes the user's details and any configured certificates to the card.
Note: If you are issuing prox-only cards, or combination chip and prox cards, if the prox part of the card is not detected at this stage, check the following:
- The card is a prox card.
- The card is the correct prox card with the correct serial number.
- The prox portion of the card is working correctly.
You can also configure MyID to use a separate external prox reader. See section 5.12.3, Printers have external readers.
-
If you are using a card printer, MyID prints the card at this point.
Note: If you have the Print Quality Confirmation option (on the Devices tab of the Operation Settings workflow) set to Yes, you are asked to confirm that the card printed correctly:
-
Did the card print OK?
If you respond Yes, the workflow completes.
If you respond No, MyID offers the following option:
-
Do you want to retry the collection?
If you respond Yes, MyID cancels the card, revokes the certificates, then attempts to issue the card again.
If you respond No, MyID cancels the card and revokes the certificates.
-
-
If the credential profile is configured for a mailing document, you can print it at this point.
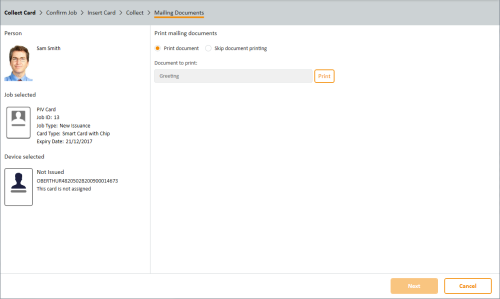
Note: For details of configuring templates for mailing documents, contact customer support, quoting reference SUP-255.
- Either select Print document, then click the Print button, or select Skip document printing.
- Click Next.


The workflow completes.
-
IKB-216 – Magnetic stripe only card issuance not supported in Collect Card
It is not currently possible to use the Collect Card
5.1.5 Collecting your own card
You can collect a card that has been requested for you. You may be able to log on with your security phrases to collect your new card. If you have logged on with a card, you can collect updates that an administrator has requested for that card using the Request Card Update workflow.
To collect a card or an update:
-
From the Cards category, click Collect My Card.
If you have more than one card request waiting, the list of jobs available for your card appears.
- Select the job you want to collect, then click Next.
-
If the card was pre-allocated using the Assign Card option when it was requested, you must present the same card. Either insert the card with the specified serial number, or type the serial number (for cards with no contact chip).
Follow the instructions on screen to collect your card or updates.
If there is a problem when issuing the card, you may be able to select a different card to try again.

5.1.6 Requesting multiple cards
You can configure MyID to request multiple cards for a single user; for example, for a team leader who may hold a stock of cards and issue them to their team members as and when required.
To configure MyID to issue multiple cards:
- From the Configuration category, select Operation Settings.
-
On the Issuance Processes tab, set the following options:
- Maximum multiple credential requests – set this to the maximum number of cards you want to request at one time. This option is for requests that require secondary validation.
- Maximum unvalidated multiple credential requests – set this to the maximum number of cards you want to request at one time. This option is for requests that do not require secondary validation.
- Click Save changes.
- From the Configuration category, select Credential Profiles.
- Create a new credential profile, or modify an existing profile.
-
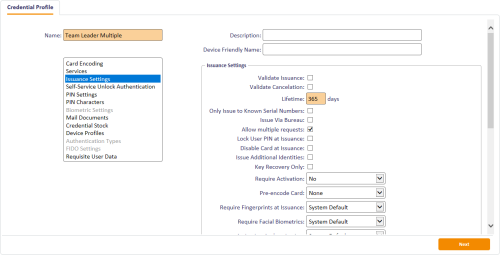
In the Issuance Settings section, set the following option:
- Allow multiple requests – set this option to allow operators to request multiple cards using this credential profile.
Note: This option appears only if you have set Maximum multiple credential requests or Maximum unvalidated multiple credential requests to a value greater than 1.
- Complete the credential profile and save it.

To request multiple cards:
- From the Cards category, select Request Card.
- Select the user for whom you want to request multiple cards.
-
From the Select Credential Profile drop-down list, select a credential profile that has the Allow multiple requests option set.
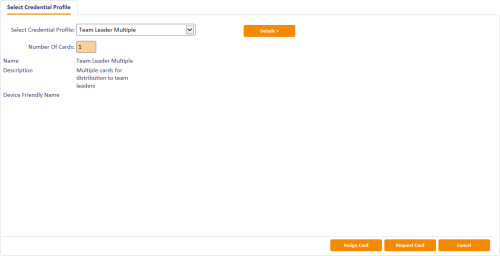
- In the Number of Cards box, type the number of cards you want to request for the user.
- Click OK.

If you have requested more cards than are permitted by the Maximum multiple credential requests or Maximum unvalidated multiple credential requests option, MyID displays a warning, and you can adjust the number of cards requested.